I’ve downloaded the trial version of this but cannot get the software to recognise my QHY camera.
The drivers can be seen in the software’s files but does not get listed in the profile when running the program. Am I missing something?
I have dowloaded and installed the latest ASCOM platform and drivers too.
Hi Jorike - I use QHY cameras and I have to say their installer is not the best I have seen.
Forgetting about SGP for the moment, can ASCOM utilities see the cameras? If they cannot, SGP will certainly not.
Hi,
I’m not really sure what you mean.
I’ve put the QHY driver in: programe(x86)/common/ascom/camera
as suggested by QHY but still the camera is not found.
I have not found one piece of software that will run the camera yet and getting so frustrated to the point of thinking of returning it.
Rik
Are you going through hubs? I did have some issues with one of my QHY cameras and it refused to work through the Paramount hub. In the end, I decided to go USB3.0 and threaded a cable through the mount.
I’m not familiar with this camera model, is it fairly new? QHY should have come back from New Year celebrations and should be able to help out.
Hi,
I’m just using USB3.0, no hubs, but I am using a powered 3m extension.
The Camera works more or less with SharpCAP although there are other problems with that too.
Just trying to find a capture software that works.
I’ve contacted QHY, waiting for a reply.
Rik
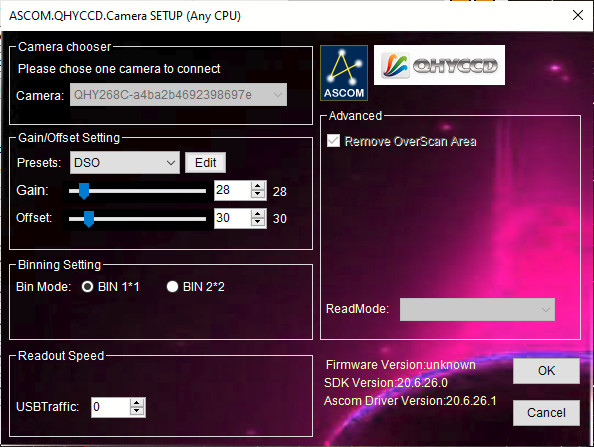
I have the same camera (awesome, isn’t it?) and I have no problems what-so-ever. I am using ASCOM driver version 20.6.26.0 It shows up as QHYCCD-Cameras-Capture in SGPro. I am attaching my setup screen from SGPro . I will happy to assist in any way I can.
Clear Skies!
Michael
I didn’t see the rest of the posts when I entered my last reply. You need to let ASCOM install the drivers. There should be an install program , and it will put the drivers where they need to be. I will see if I can find the link I used to install it… Found it! I tried to attach it but not allowed. The file is called QHYCCD_Win_AllInOne.20.06.26.36.exe
You can Google it to find where to download. (I would stick to QHY sites…)
Let me know if you have any more problems…
Clear Skies!
Michael
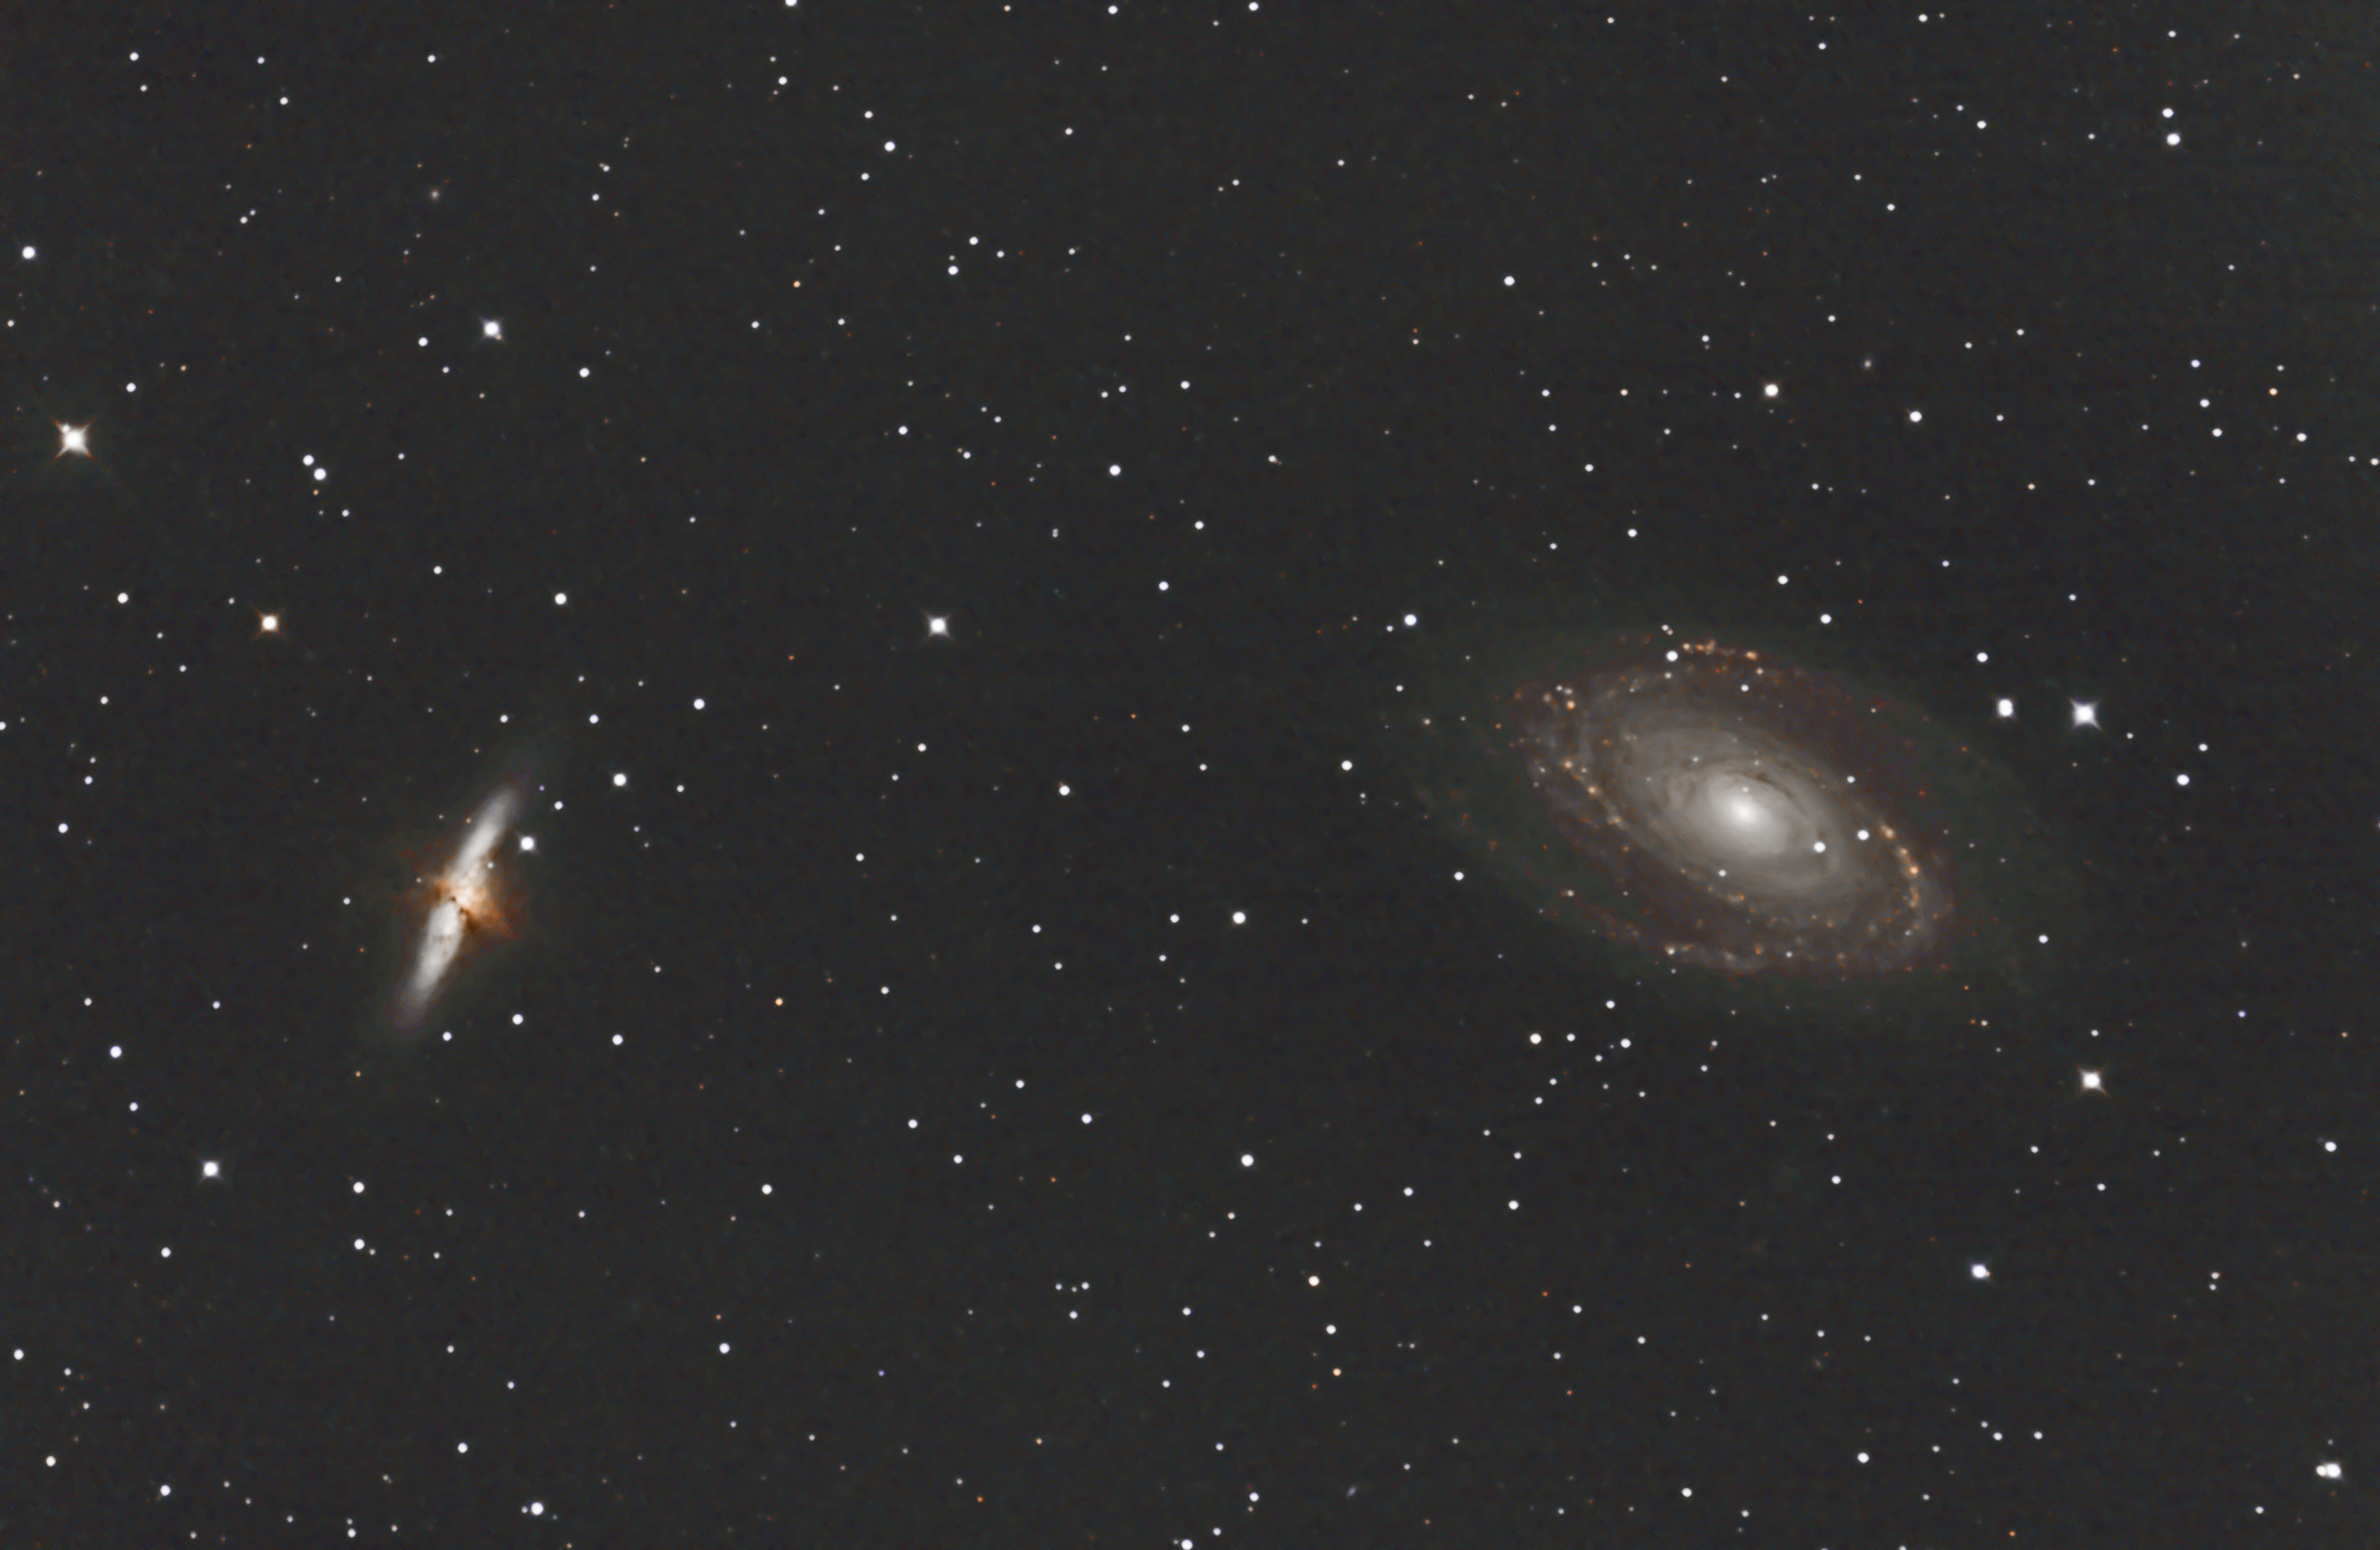
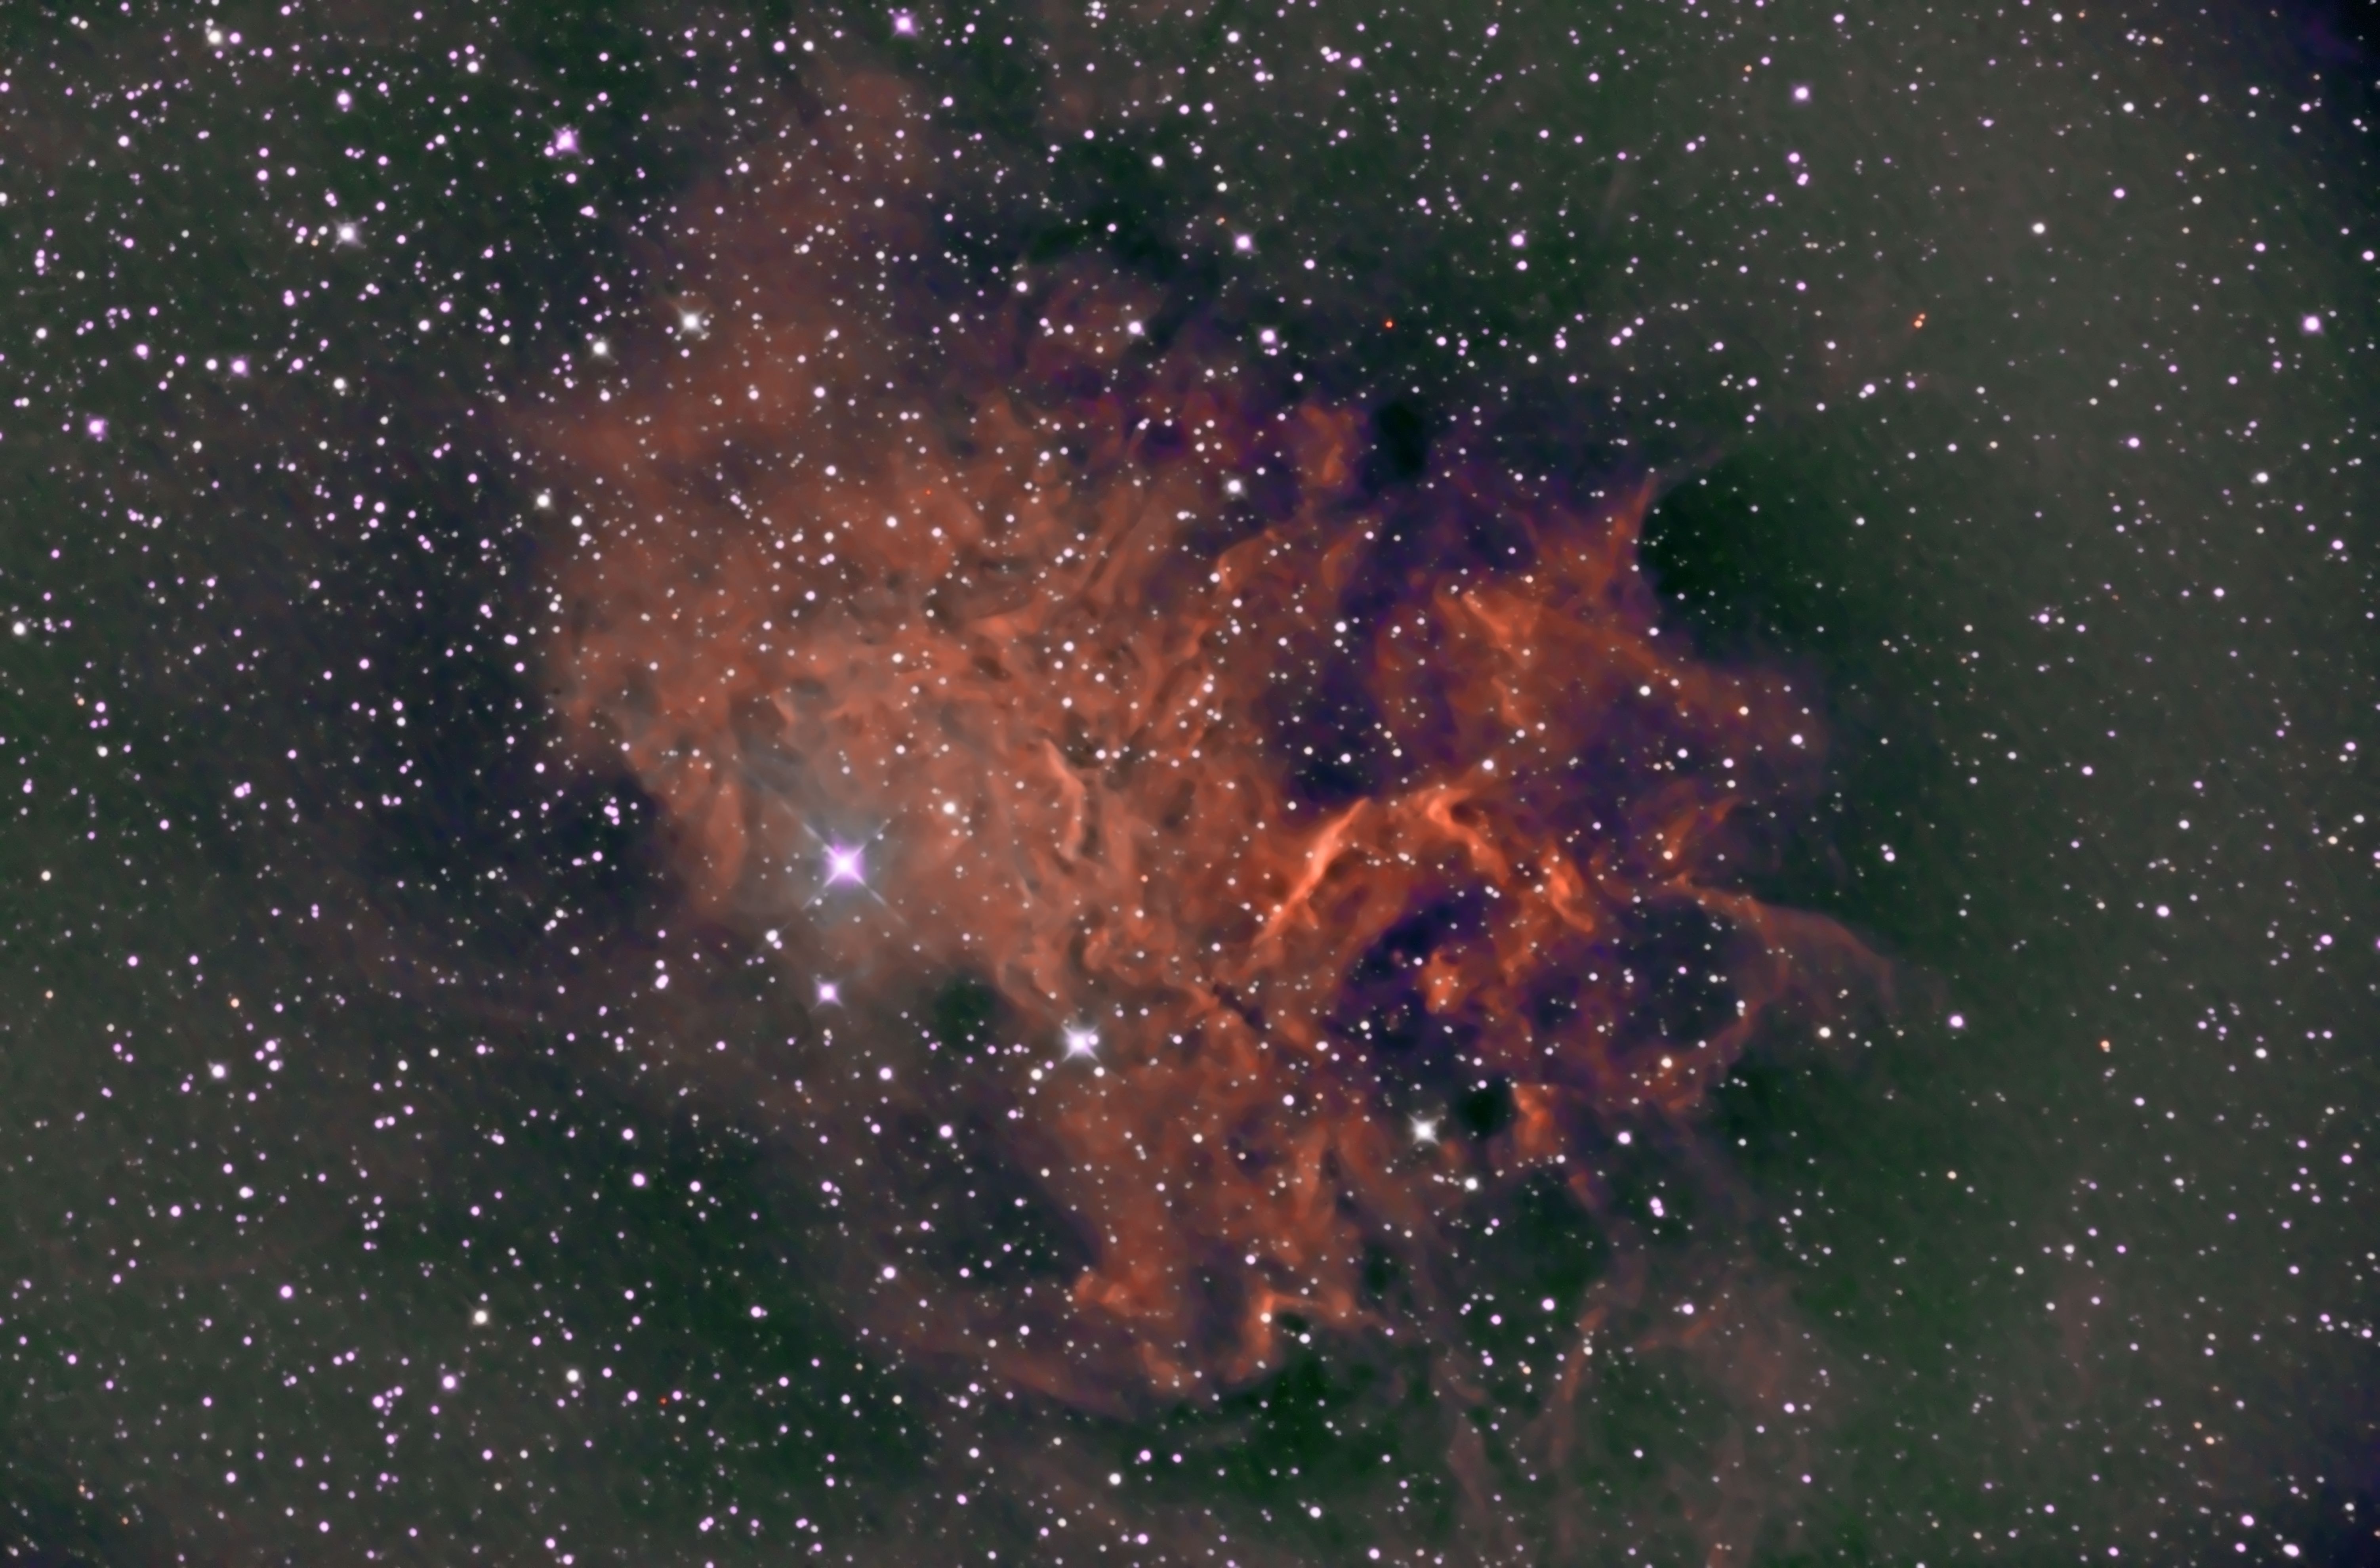
And you don’t want to return this camera. It is AWESOME! I took these the other night. My post-processing skills suck!..
Hi Michael,
I have already installed this exact program but the QHY camera does not show up in SGP:
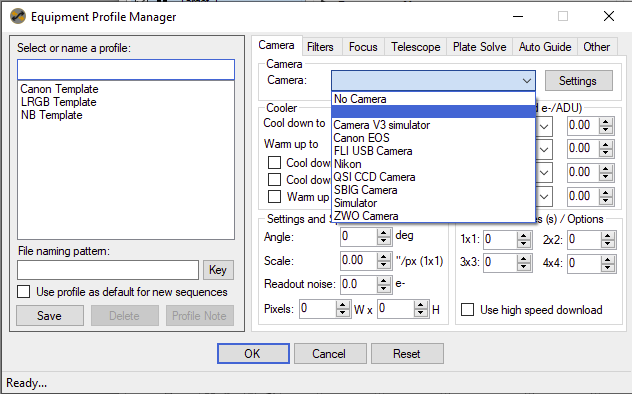
Thanks, Rik
Rik,
Have you tried uninstalling it and re-installing? Without the ASCOM driver it won’t work with SGP. I have it installed on several machines with no issues. I hope that you are able to get it working for you. You will love this camera. Are you using Windows 10? Good luck!
Clear skies!
Michael
Hi Michael,
I have success thank you, I found I was not actually checking the ASCOM install box because it had in brackets after it (Filter Wheel) so I thought it didn’t apply for the camera doh!!
It’s now working and quite reliably.
Just need to figure out how to use it now, produced 20 blank test images/stacked and in converted for PS so should be ready for dark skies now.
Thanks
Rik
Great! You are going to love this camera! It truly is awesome. I have been using a CCD for years, so I wanted to try the new CMOS technology. I am so glad I did! And 26mpx too! Feel free to reach out anytime!
Clear Skies!
Michael
Thanks Michael,
I’ve only taken a couple of shots ‘unguided’ with this so far and am very new to it all.
Learning by mistakes as I only started in AP last may using a Canon 40d.
SGP has certainly opened my eyes to what is possible!
Plate solving looks much easier than Star Alignment.
Not really had many clear nights here in the UK recently
Rik
Jorike,
Learning by mistakes is how it’s done. I have been doing that my entire life. (LOL) At least with AP you always get another chance! This camera will certainly speed up the process. I live in southern Oregon in the US. We had 3 clear nights in the last 3 months! The weather is finally changing, and I am really looking forward to using this cameras this year. I didn’t get it until December, so I have not had a lot of time with it. I have been using a QHY10 for the last few years developing my skills. I can give you a few generic pointers that really helped me figure some things out.
-
Don’t try and just figure it out yourself when you can see how other people have had success doing what you are wanting to do. There are a lot of different types of telescopes, mounts, and cameras that need to work together. It takes time to figure it all out. The first year I didn’t get a single good image, at least not by comparison to now. Don’t give up!
-
Research your equipment, especially the equipment you already own. It is important to match the camera to your telescope to prevent over and under sampling your captures. Starting with good data is critical to getting good results.You can go here https://astronomy.tools/calculators/ccd_suitability to see where you are starting. Don’t worry if they don’t match. There are many ways to get what you want with what you have. I have used this QHY268 successfully with several different configurations for a 60mm f/6 refractor, 127mm f/6 refractor, 254mm f/4 reflector, and 2000mm f/10 SCT.
-
Take calibration frames! This camera has very little noise so dark frames aren’t as critical, but the bias and flat frames will make a night and day difference in your results. You can take your bias and dark frames during the day to get used to the camera and software. Flat frames are VERY important. You can get some nice pictures without them sometimes, so it is easy to skip them. I have a 10" truss tube imaging reflector. It took a year of trying to figure out how to get useful flat frames, but the difference in my images went to another level overnight.
-
Details are important! ‘Close enough’ really isn’t. As your skills improve you will find that your captures are limiting your results. It is a lot easier to stop the problem before you take the picture, than to remove it afterwards (flat frames will remove a lot of unwanted artifacts, for example). Adjusting your exposure times, as well as gain and offset values can be a big help. Check your calibration frames. If they are bad, they impact every image. Easy to do. Just process with and without. You will figure out what you need.
-
Don’t get in a hurry or give up! You will waste countless hours capturing images only to find that something wasn’t right, and need to wait a week to try again. There is nothing like having everything go perfectly, only to find out your focus was off so you have 12 hours of data that won’t register. If it takes 30 minutes to get focused, you will be way ahead. Every problem has a solution, and you will begin to see the problems and prevent them before they happen. Every problem teaches something. For focusing, it took a batinov mask, and patience for my fingers to learn how to do it. Major improvement to my imaging! (I eventually got an electric focuser.)
-
Never forget that capturing the images is not the same as processing them! It is a LOT easier to take the pictures than it is to process them. Your skills will develop at different speeds. You can always go back and reprocess your photos as your processing skills improve, and your processing will lead you to make changes in your capture routine. Always strive to get better at both, but learn to figure out where the problems are coming from. Are the captures the problem, or combining them together? You get the point…
-
Get a routine down to make it fast and easy. In my case, now my telescope is setup all the time now in a shed with a sliding roof. It wasn’t always that way, but the requirements are exactly the same. Your telescope needs to be set up and aligned. You can accomplish that quickly once you know how. I use a polemaster now to get the polar alignment correct when I am mobile, but did it manually for years. I can set my entire system up from scratch and get it dialed in 30 minutes or less to do AP.
Now, I can turn on the mount and camera, load my saved alignment, point at a star to verify my alignment and adjust my focus with a batinov mask, in 10 minutes or less. I check my collimation every week or so. I check the mount to make sure everything is correct and nothing has changed. I can usually accomplish all of this before the sun has finished going down. (You don’t need total darkness to align and focus using a batinov mask.) -
This camera has no IR cut filter. You may have problems without a filter of somekiind. You should try to use it with filters when you can, or your images can have some serious artifacts from light pollution sometimes. I use a cheap SVBONY CLS filter off Amazon whenever I am not using a Triad Ultra (not cheap), but then I have specific light pollution that I need to deal with. You may not have these issues…
You have probably heard all of this before. I know that I ‘knew’ it too, but until I started getting serious about it I wasn’t getting the results I wanted. Impressive images take effort.
Take the calibration frames. Most of them you can do monthly or longer. You take flats any time you change your optics. If I move or rotate my camera I take flats after the next’s shooting. Anytime I remove my camera, before I put it back I check my collimation. It takes less than a minute, and makes sure that you get the best images possible.
Always check your focus. Some telescopes change quite a bit. Check yours and figure out what your setup requires. Evey system is different.
Details will bite hard! I spent months trying to track down the incorrect spacing for my coma corrector. In the end it was the difference between 2 different 2" adapters. I spent hundreds of dollars, and have a very nice spare Paracorr2 coma corrector because I didn’t see the difference between the adapters and used them interchangeably.
What can I say, lessons learned! It takes a lot of work to get it all figured out, but it is certainly worth the effort. You won’t be getting the internet quality images in the beginning, and will never get the Hubble quality images you see on TV all of the time. It should not stop you from trying. You will get some AWESOME results if you stick with it, especially with this camera. You will not be a bit disappointed!I have tried most of the different software packages available in the last few years. SGPro is a great tool for acquiring the images you want. There are others, but I like the reliability of SGPro. I set it up and go to bed until it’s time to close the roof. I currently use AstroPixelProcessor to calibrate and stack my images, and PixInsight to process them. There are a lot of options available that work very well. It is a matter of preference. Whatever works for you.
Sorry about jumping around. I would be more than happy to assist in any way I can. I just threw out some things that may help you get up to speed quicker. Good luck! You made a great choice on a camera. It is arguably the best option available in that price range.
What are you using for a mount and telescope? I have tried this camera on several setups, and have even had great results taking unguided photos on a manual mount with short exposures because the noise is so low. Enough rambling for now! Feel free to reach out if there is anything I can help you with!
Clear skies!
Michael
Hi Michael,
Thanks for all the useful advice.
I am having still lots of problems with this camera.
Are you able to explain why I am getting loads of hot pixels in my images?
It doesn’t appear to be readout noise of heat noise!
I just can’t figure out what’s going wrong?
Is it me or the camera?
Rik
I cannot see a useful image right now on my phone, but I would not think that readout noise would be a problem. What settings are you using? Your gain should be 0 if you are shooting broadband. I use 28 for shooting narrowband with a Triad Ultra. You don’t need more than that. You will just amplify noise. Are you using calibration frames? How are you processing your images? With some details I am sure I can help…
Clear Skies!
Michael